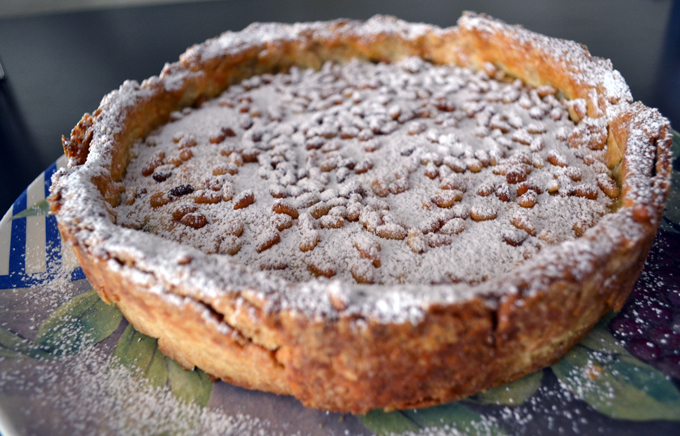
Torta dei Nonni
Prep time
Cook time
Total time
A coming together of Torta della Nonna and Torta del Nonno. The recipe may seem daunting since it is rather lengthy, but the step by step instructions are simple and will insure complete success.
Author: Paula Barbarito-Levitt
Recipe type: Dolce
Serves: 8 to 10
Ingredients
- 1 recipe for Pasta Frolla
- ½ cup all purpose flour
- ½ cup granulated sugar
- 1 vanilla bean split, seeds loosened with the tip of a paring knife
- 2 strips of fresh lemon peel
- 6 egg yolks from large eggs
- 2 cups of whole milk
- Pinch of salt
- 2 Tbs. unsalted butter
- ¼ cup of Dutch processed cocoa powder, sifted
- ¼ to ½ cup additional whole milk to thin the pastry cream
- 1 egg lightly beaten with 2 Tbs. of water, for glaze
- ⅓ cup pine nuts
- Confectioner's Sugar
Instructions
- The Pasta Frolla should be made and resting as directed in the original recipe. At least 2 hours before, preferably the evening prior to preparing the torta, the pastry should be rolled out. Butter a 9" springform pan. Follow the instructions in the recipe, placing the bottom crust into the springform pan gently, bringing the dough up the sides of the pan. The top crust should be left in one piece. Refrigerate the uncooked pastry crust.
- To prepare the Crema Pasticcera or Pastry Cream place 1¾ cups of the milk in a small saucepan along with the split vanilla bean, lemon peel, and 1 Tbs. of the granulated sugar. Heat over a low flame until warm, turn off the heat and allow the milk to steep for 10 minutes.
- Combine the flour and remaining sugar in a small bowl and whisk thoroughly to combine the two ingredients.
- Place the egg yolks in a medium sized mixing bowl, add the flour/sugar mixture and salt. Combine with a whisk or fork, the resulting mixture will be quite thick. Add the remaining ¼ cup of milk and continue to mix until smooth, using a spatula to scrape down the sides. Try to have the mixture as smooth as possible, although there may be some solids remaining due to the composition of the egg yolks - there should not be any actual lumps.
- Once the milk has steeped, return the flame to low medium. When the mixture is almost at the point of a slow boil, remove the vanilla bean and lemon peel. If there are remaining seeds in the pod, scrape with the point of a knife and return them to the milk.
- Take about ¼ cup of the hot milk and whisk it into the egg yolks to temper them thereby avoiding curdling. Continue with another ½ cup of the hot milk adding it slowly, whisking continuously.
- Add the tempered egg yolks to the hot milk, adjust the heat to medium low, and stir gently -alternating between a whisk and a rubber spatula.
- The custard needs to reach a slow boil in order to properly thicken, once it has reached this point cook for an additional 2 to 3 minutes, whisking and scraping down the sides of the pan with a spatula. When thickened, reduce the heat to low and cook for an additional minute. Immediately remove from the heat and whisk in the butter, one tablespoon at a time.
- Have a strainer set over a glass or ceramic bowl, a second smaller similar bowl, the sifted cocoa and plastic wrap ready.
- Once the butter has been incorporated into the pastry cream, immediately scrape the mixture into the strainer set over the bowl. Press the custard through the strainer, into the bowl using a rubber spatula or table spoon. This will insure a smooth pastry cream, eliminating any solids that may remain. Be sure to scrape the underside of the strainer with a clean spatula so as not to loose any of the pastry cream.
- Remove between ⅓ to ½ of the pastry cream to the other bowl. Cover the pastry cream in the first bowl by placing plastic wrap directly over the custard; this will prevent a crust from forming.
- If you decide to use ½ of the pastry cream add the entire ¼ of a cup of sifted cocoa, whisking to incorporate completely. You may use the entire amount of cocoa for ⅓ of the pastry cream if you prefer a deep chocolate custard. If the custard seems too thick, loosen it by adding some of the whole milk, a few tablespoons at a time. Generally, I have not needed the entire ½ cup, however this will depend upon the cocoa you use. Remember, the custard does need to set and the milk creates a more creamy consistency when adding cocoa powder. Cover the chocolate pastry cream with plastic wrap, placing the wrap directly over the custard to prevent a skin from forming. Allow both to cool in the refrigerator, preferably overnight.
- Preheat the oven to 375º F and remove the pastry lined springform pan from the refrigerator, trim the top of the crust with a pairing knife so the pastry is even all around. This is much easier to do once the pastry has been refrigerated. Carefully line the pastry with foil and bake for 12 minutes. Gently remove the foil and bake for an additional 3 minutes, just until the center of the pastry seems dry and the edges are a bit golden. Allow to cool completely and remove the piece of pastry that has been rolled out to create the top from the refrigerator along with the two pastry creams.
- Preheat the oven to 375º again. Now that the bottom crust has completely cooled, spoon the chocolate pastry cream into the partially cooked shell, using the back of a large spoon to spread it. Spoon the vanilla scented pastry cream over the chocolate pastry cream in the same manner, creating two layers of custard.
- Take the top layer of pastry and place it over the center of the filled shell, pressing the edges together carefully to seal the torta. Once again, use a paring knife to trim the edges, which will come up about ¾".
- Brush the top of the torta with the beaten egg and sprinkle with the pine nuts. Place in the center of the oven and bake at 375º for 15 minutes, reduce the oven temperature to 350º and continue to bake for an additional 15 minutes or until the torta is nicely golden. Remove to a rack and allow to cool.
- Once the torta is cool, slide a knife around the edge of the springform pan, pressing aagainst the sides of the pan to release any crust that may be adhering to the pan. Open the spring and slide the torta onto a serving plate. Dust with confectioner sugar and enjoy. The torta will last several days, covered with plastic wrap on the counter - that is is you can resist it!
Recipe by LaBellaSorella at https://labellasorella.com/2015/02/grandparents-cake/